因为server2019系统中无法使用python调用FreeCADGui(原因大概率是虚拟系统/云服务器系统没有安装显卡驱动),所以尝试在Linux系统里调用。
20241101解决这个问题https://zhuanlan.zhihu.com/p/666093183
下载mesa3d-24.2.5-release-msvc.7z
解压后运行运行 perappdeploy.cmd,提示给定一个文件夹,在D盘新建一个文件夹。看提示一路完成。
再运行运行 systemwidedeploy.cmd 后,输入【1】然后按回车键。然后就可以在server2019上启动freecad了。
为何要调用这个Gui?因为要导出带颜色的模型。也可以将模型作为压缩文件,解压后读取其中的xml文件来获取颜色表。
使用linux系统要留意文件系统的大小,默认安装情况下,可能root空间很小,home空间很大……详见这里,所以要将程序之类的放对位置,否则容易满。要放home下。
一、远程桌面准备
假如用SecureCRT远程连接到服务器
1.安装xrdp
[root@localhost ~]# yum –enablerepo=epel -y install xrdp
[root@localhost ~]# systemctl enable xrdp –now
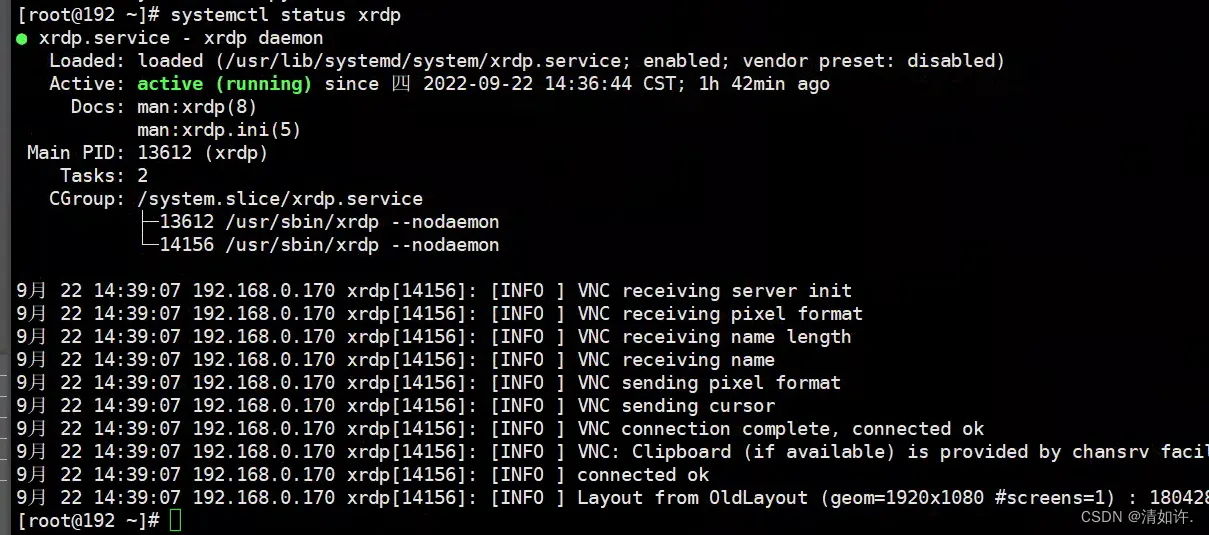
[root@localhost ~]# systemctl status xrdp
查看3389端口是否开启
[root@localhost ~]# firewall-cmd –query-port=3389/tcp
no
[root@localhost ~]# firewall-cmd –reload
success
开启3389端口
[root@localhost ~]# firewall-cmd –add-port=3389/tcp –permanent
Warning: ALREADY_ENABLED: 3389:tcp
success
再次查看3389端口是否开启,显示yes
[root@localhost ~]# firewall-cmd –query-port=3389/tcp
yes
2.添加一个非root用户
因为qt不能用root用户运行,需要添加新用户,并赋予权限。root用户会出现问题“Qt: Session management error: None of the authentication protocols specified are supported”
[root@localhost ~]# sudo adduser qinxc
[root@localhost ~]# sudo passwd qinxc
教程见:https://blog.csdn.net/weixin_43845090/article/details/108917468
[root@localhost ~]# chmod -v u+w /etc/sudoers
[root@localhost ~]# vim /etc/sudoers
进人编辑,下拉到最后,找到root所在位置,然后把新建的用户名添加到后面,保存,退出:wq
## Allow root to run any commands anywhere
root    ALL=(ALL)       ALL
qinxc ALL=(ALL) ALL #这个是新用户[root@localhost ~]# chmod -v u-w /etc/sudoers
3.远程桌面登录
从windows下mstsc进入远程linux桌面,用这个新用户登录远程桌面,鼠标右键点击远程桌面,打开终端命令行
对新建用户设置root权限
[qinxc@localhost ~]$ sudo passwd root
[qinxc@localhost ~]$ whereis sudoers
sudoers: /etc/sudoers /etc/sudoers.d /usr/share/man/man5/sudoers.5.gz
[qinxc@localhost ~]$ ls -l /etc/sudoers
-r–r—–. 1 root root 3938 4月 11 2018 /etc/sudoers
[qinxc@localhost ~]$ chmod -v u+w /etc/sudoers
chmod: 更改”/etc/sudoers” 的权限: 不允许的操作
failed to change mode of “/etc/sudoers” from 0440 (r–r—–) to 0640 (rw-r—–)
4.将qinxc切换到root权限
[qinxc@localhost ~]$ sudo su
[sudo] qinxc 的密码:
ABRT 已检测到 ‘1’ 个问题。预了解详细信息请执行:abrt-cli list –since 1723602631
可以看到下方的qinxc提示符已经发生了变化,变成了[root@……了
[root@localhost qinxc]# ls
二、下载、解压、运行
1.下载0.22周编译版:
$ wget https://github.com/FreeCAD/FreeCAD-Bundle/releases/download/weekly-builds/FreeCAD_weekly-builds-38459-conda-Linux-x86_64-py311.AppImage
如果发现下载速度慢,可以取消后重新执行上述命令,我的下载速度在2MB/s以上
2.修改权限
$ chmod 755 ./FreeCAD_weekly-builds-38459-conda-Linux-x86_64-py311.AppImage
3.解压,默认解压到/root/squashfs-root/文件夹下
$ ./FreeCAD_weekly-builds-38459-conda-Linux-x86_64-py311.AppImage –appimage-extract
4.运行freecadcmd
进入freecad所在的bin目录/root/squashfs-root/usr/bin
[root@localhost bin]# ./freecadcmd generateThumbnail.py
FreeCAD0.22.0,Libs:0.22.0devR38459(Git)c)Juergen Riegel, Werner Mayer, Yorik van Havre and others 2001-2024FreeCAD is free and open source software licensed under the terms of LGPL2+ licenseFreeCAD wouldn’t be possible without FreeCAD community.
上面命令中的python代码如下:
# generateThumbnail.py

import FreeCAD
import FreeCADGui as Gui
import Part, Mesh

Gui.showMainWindow()
# window = Gui.getMainWindow()
# window.showMinimized()
doc = App.activeDocument()
doc = App.open('/root/test22.FCStd')

view = Gui.getDocument(doc.Name).activeView()
view.setAnimationEnabled(False)
view.viewAxometric()
view.fitAll()
view.saveImage('/root/33.png',800,600,'Transparent')
5.启动fc图形界面
可以用./FreeCAD_weekly-builds-38459-conda-Linux-x86_64-py311.AppImage命令启动
也可以解压AppImage后进入解压后的文件夹内,进入AppRun所在目录,运行下列命令
[root@localhost squashfs-root]# ./AppRun
三、坑
1.命令行的终端连接不行,不是图形界面的远程连接是无法启动fc的gui的。
2.linux里link20240207版不行,无法运行Gui.showMainWindow()——这行命令会退出
3.经过在终端下,解压appimage后,进入bin文件夹,执行freecadcmd命令,进入python编辑器状态,一行行输入,才能发现问题所在,所以效率极低,但是也是一种笨办法。
所以可能上述python代码,开始采用了def 函数的调用,可能执行不了,所以需要再试验。例如,开始时是下面这样的,没有执行成功,需要再调试:
def generateThumbnail(inputfile, outputfile):
    try:

if __name__ == '__main__':
generateThumbnail('/root/test22.FCStd', '/root/22.jpg')4.用./FreeCAD_weekly-builds-38459-conda-Linux-x86_64-py311.AppImage freecadcmd *.py这种方式,论坛上有这样的方式,但是不行,所以要解压AppImage后进入到bin目录下执行freecadcmd命令带上python代码文件。
5.server2019里周编译版也不行,link版20240207肯定是不行
以下是过程或参考:

以上左侧是linux里启动freecad界面,右侧是freecadcmd启动GUI出错
下面是win下命令行启动GUI,能正常导出渲染图
D:\FreeCAD-Link-Stable-Win-x86_64-py3.11-20240407\bin>freecadcmd generateThumbnail.py
FreeCAD 0.21.0, Libs: 2024.408.0R14555 (Git shallow)
QObject::connect: No such signal QApplication::messageReceived(const QList<QByteArray> &)
QObject::connect: No such signal QApplication::messageReceived(const QList<QByteArray> &)
1.696463 <asm3.main> init_gui.py(14): no solver backend found
Main window restored
Show main window
Toolbars restored
Not detached all observers yet
Not detached all observers yet
wget断点续传
当文件特别大或者网络特别慢的时候,往往一个文件还没有下载完,连接就已经被切断,此时就需要断点续传。wget的断点续传是自动的,只需要使用-c参数,例如:
wget -c http://the.url.of/incomplete/file
使用断点续传要求服务器支持断点续传。-t参数表示重试次数,例如需要重试100次,那么就写-t 100,如果设成-t 0,那么表示无穷次重试,直到连接成功。-T参数表示超时等待时间,例如-T 120,表示等待120秒连接不上就算超时。
Linux 下Appimage 压缩与解压
appimage自身支持直接压缩和解压--appimage-extract
extracts the contents from the embedded filesystem image, then exits. This is useful if you are using an AppImage on a system on which FUSE is not available
从嵌入的文件系统映像中提取内容,然后退出。如果您在FUSE不可用的系统上使用AppImage,这将非常有用$ xxxx.AppImage --appimage-extract
https://developer.aliyun.com/article/1143857
远程桌面安装参考
1 概述
我们知道,我们日常通过vnc来远程管理linux图形界面,今天分享一工具Xrdp,它是一个开源工具,允许用户通过Windows RDP访问Linux远程桌面。 除了Windows RDP之外,xrdp工具还接受来自其他RDP客户端的连接,如FreeRDP,rdesktop和NeutrinoRDP。
2 安装GNOME默认桌面环境
一般情况下我们安装Centos系统的时候都是使用的命令行模式,但是有些业务场景还是桌面模式看的更清楚,所以我们可以安装桌面环境来更清晰的操作系统,在Centos系统中用到的就是GNOME桌面
安装命令:
yum groupinstall “X Window System” -y
yum group install “GNOME” -y
如果已安装,可以省略这一步
3 安装Xrdp
yum install xrdp -y
启动Xrdp服务,并设置开机启动
systemctl enable xrdp –now
查看Xrdp的启动状态
systemctl status xrdp
输出如下显示成功
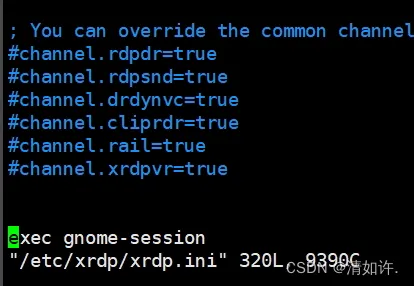
4 配置Xrdp——这一步没做,好像也没事
设置Xrdp使用GNONE,编辑配置文件,添加如下行
sudo vim /etc/xrdp/xrdp.ini
在文件最后添加如下一行
exec gnome-session
保存后,重启Xrdp服务
sudo systemctl restart xrdp
5 配置防火墙(如果启用了防火墙的话),放行3389端口
默认情况下,Xrdp监听3389端口
查询对应端口号
firewall-cmd –query-port=3389/tcp
如果显示no,则开启
注意这条命令是 –add,加入端口号,上面那个是query查询端口号
firewall-cmd –add-port=3389/tcp –permanent
然后重启防火墙
firewall-cmd –reload
如果使用的是云服务器(如阿里云、华为云),还需要通过安全组规则放行3389端口。
6 测试连接
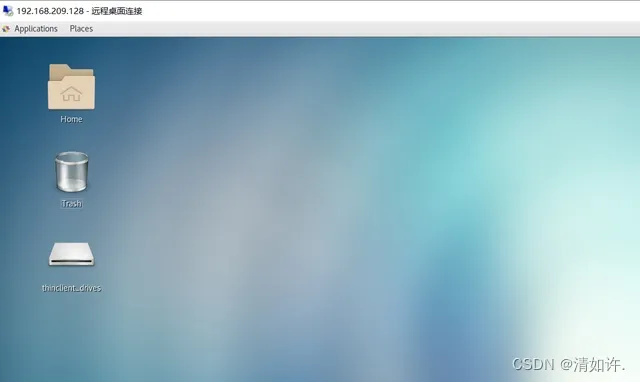
使用windows自带的远程桌面客户端进行连接
输入Linux的用户名和密码等信息
登录成功
7 问题
root用户无法使用qt,“Qt: Session management error: None of the authentication protocols specified are supported”
要建立一个用户
创建用户vncuser
sudo adduser vncuser
设置密码
sudo passwd vncuser
原文链接:https://blog.csdn.net/lxyoucan/article/details/113179208
最后编辑:秦晓川 更新时间:2026-02-10 20:05
